Amazon PPC is Complex, Time Consuming & Difficult To Optimise. So 80/20 It…
There are so many factors that you can consider. Doing everything is impossible.
A seemingly attractive solution is to let a “set-it-and-forget-it” or automated tool handle everything for you.
But that means you’re losing control of your account. And too often it saves time at the expense of profits.
But there’s another way…
- to dramatically and consistently increase your Amazon profitability
- to massively reduce the time that Amazon PPC optimisation takes
- to enable you to take control of your PPC (after all you know best what your Amazon strategy is at any given time)
- to leverage your Amazon PPC history to run more profitable ads in future.
The key to consistent, long-term Amazon PPC success is to keep things simple and prioritise what’s most important.
The 80/20 Way To Dramatically Increase Your Amazon Profits:
- Only run profitable keywords (break-even or better).
- Run them as profitably as you can.
- Run as many as you can.
- Repeat.
How?
Do this:
You do this for 2 reasons:
1.) Cutting waste increases your profits, both short-term and ongoing
2.) You can add your known non-performers to your negative keyword list, so that you don’t waste money on them when researching new keywords.
You do it repeatedly because:
1.) Things change. Just because a keyword is profitable now it doesn’t mean it always will be (product life-cycles, seasonality, competitor changes, etc.)
2.) Your PPC account will have 100’s, if not 1000’s of “sneaky leakers” - low volume search terms which generate clicks (and therefore cost) but don’t create sales. In a typical 60 day Amazon PPC report these generally go under the radar - there’s not enough data to make a decision. But as your advertising history grows more and more “sneaky leakers” will trigger the criteria for being added to the negative keywords list.
This is a secret weapon in gaining advantages over your competitors… to find places to advertise that they haven’t even thought of… and most likely couldn’t afford to find.
Once you know you can minimise waste spend from the get-go (using your negative keywords list) you can be more aggressive with your auto-targeting or broad match ads.
These are like massive trawling fishing nets, harvesting volumes of potential keyword winners. Let them run, ruthlessly and repeatedly minimise the waste spend… and discover profitable keywords that you haven’t even considered before.
It almost certainly isn’t how you think it works.
And certainly not how 99% of what you read online leads you to believe.
How can we be so certain?
1.) We’ve advertised on Amazon since 2012 and we spent years testing theories until we made the discovery that explained why our previous optimisations, which were made on 100% solid logic, failed miserably and expensively.
2.) If you read Amazon’s own documentation carefully you can see that they actually hint at how Amazon PPC works. But it’s hidden in plain sight. You have to read between the lines. And even then it’s not immediately obvious.
3.) If you know where to look your data confirms it.
2.) It’s based on outdated information and a fundamental misunderstanding of how Amazon works.
ACoS is a false friend.
It’s a useful metric but it’s not the goal - maximising profit is.
The obsession with ACoS reduction leads to lost profits. After all, if an ad is profitable then you want to run it as much as possible… regardless of whether it increases your overall ACoS.
So you need to know your break-even ACoS - that’s your target maximum. Anything above that and you’re losing money, so you need to refine your ads to hit that level or better.
If your PPC account is structured with 1 product per AdGroup then you can optimise at the product level. It’s the most profitable.
Dayparting is a powerful tool for optimising your Amazon PPC strategy
- if your products get a lot of traffic
- if customers behave differently at different times of the day
- if that behaviour is consistent e.g. it doesn’t change seasonally
If a search term does not get enough traffic for dayparting then the temptation is to work at the AdGroup or even the Campaign level.
But any combining of data muddies the waters and leads to sub-optimal results, because you can’t know if the results are consistent across all of the search terms. So you may well sacrifice profitable sales in your quest for optimisation.
Dayparting is useful when used with the right product and market but it isn’t a cure-all.
It’s tempting to tweak your bids to try to save pennies per click to reduce your ACoS and increase your profits.
And it can work, although isolating the effect of the bid change from the numerous other factors is extremely difficult.
After all, even if you keep bids the same the daily statistics (eg number of sales, clicks, ACoS etc) can vary significantly.
So how can you tell what extra effect a small change in bid has?
It's Easy When You Know How
AdRazor is the product of over a decade of experience, frustrations, experimentation, false-dawns... and finally 'Eureka' realisations, reduced PPC costs, increased sales, #1 BSR Amazon products... and dramatically increased profits.
Fastest Control Of Your PPC
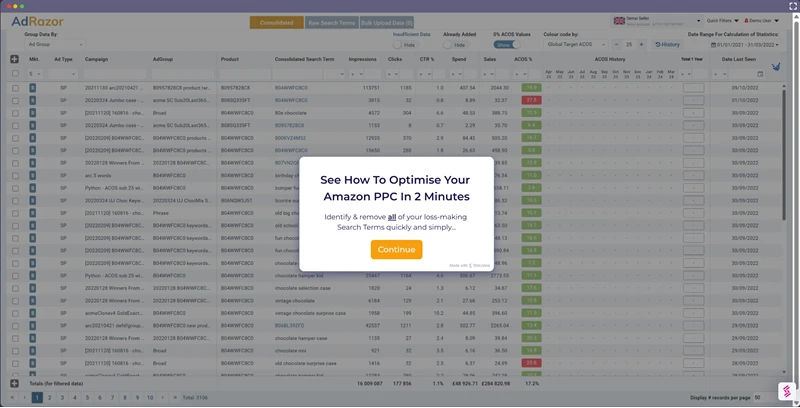
Analyse all of your sponsored products & brands in minutes. Compare all running search terms against your target ACoS. Quickly identify:
- Zero-Sales Search Terms
- Too-Expensive (Above Your Target ACOS)
- Profitable Terms
- Seasonal Terms
- Bid Cannibalisation

Analyse At The Most Profitable Level
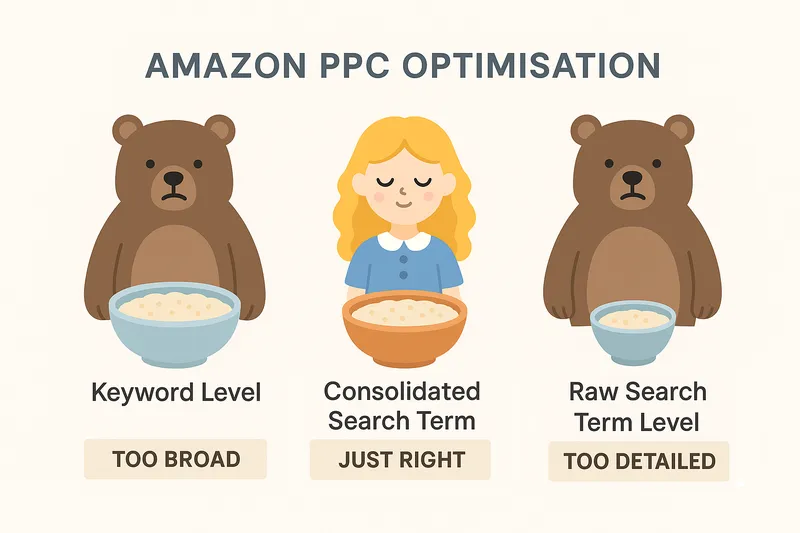
Keywords give you too little control, especially when setting -ve keywords. And raw search terms analysis is misleading because of how Amazon treats exact match (see below). Consolidated Search Terms are the only true way to optimise your PPC.
- Use Keyword targeting to generate the data.
- Use Consolidated Search Terms to laser-target the most profitable terms.
- Use Consolidated Search Terms for precise setting of negatives.
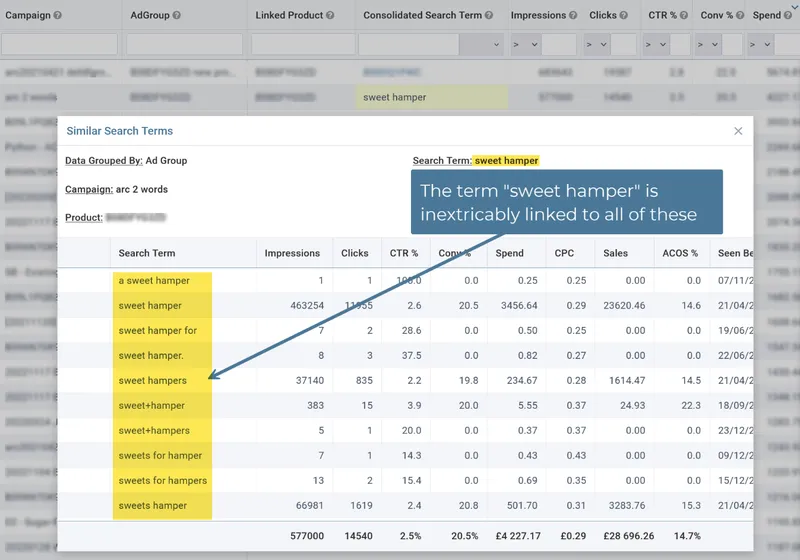
Exact Match Does Not Mean EXACT...
This common mistake can increase your ACoS by 75% or more AND decimate your sales at the same time.
- Amazon treats singulars and plurals as exact matches.
- Amazon ignores 'stop-words' e.g. of; for; with; by; etc
- So 'gift man'; 'gifts for a man' & 'gifts by men' are exact matches
- Also applies to negative keywords; block one & you block them all
- AdRazor shows you your data as Amazon sees it.
Unlimit Your Ad History
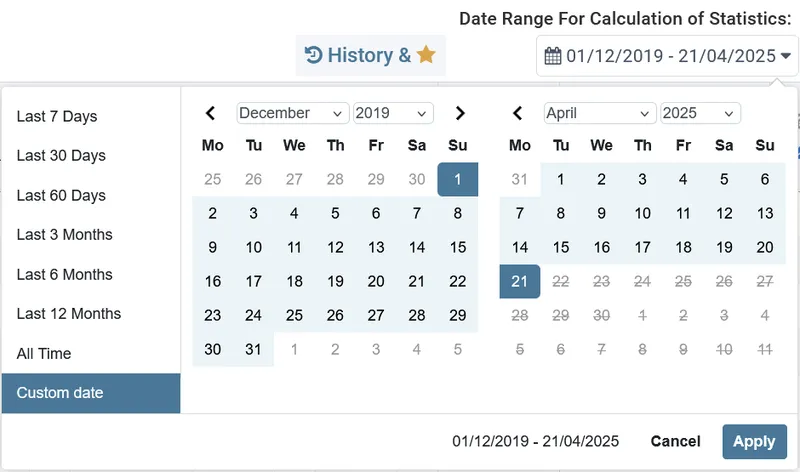
Your biggest Amazon PPC asset is leaking away every day because Amazon only lets you see the last 60 days of data. AdRazor removes that limit. No longer are you forced to make snapshot decisions with insufficient data.
- When you sign-up AdRazor downloads the last 60 days of PPC data
- Every 24 hours AdRazor updates your data
- No limits: if AdRazor has your data then you can analyse it.
- Your PPC history is now your ever-growing competitive advantage.
Instantly See What's Working
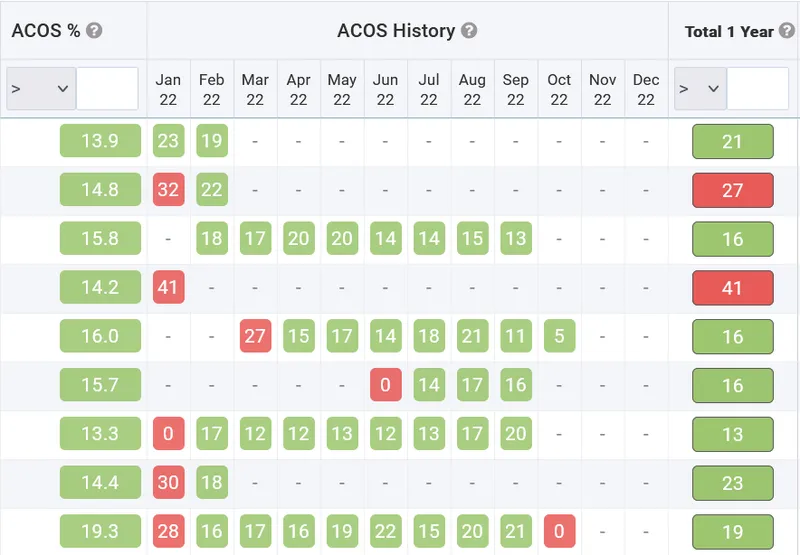
Looking at screens full of numbers and metrics can be overwhelming. But AdRazor's unique traffic-light colour-coding changes that in an instant. See immediately what is working and what is not.
- Set your target ACoS (everything is compared with that)
- Red = Too high
- Green = Your target ACoS or below
- Gray = Need more data

Shiny Object-Free Zone
There is no secret, mystical algorithm behind AdRazor. There doesn't need to be. AdRazor was created to both optimise your Amazon PPC fast and give you the information you need to run more profitable PPC in future.
- Created by Amazon PPC veterans with 11+ years of experience.
- Adopts the 80/20 approach - focusing on what has the most impact.
- Prioritises profit over ACoS (a useful metric not a goal.)
- Ensures you are in control at all times.
Master Amazon PPC Fundamentals
Learn the strategies behind profitable Amazon advertising with our free comprehensive guides:
Getting Started:
- Amazon PPC for Beginners - Complete foundation guide
- Common Amazon PPC Mistakes - Avoid costly errors
Understanding Key Metrics:
- ACoS vs TACoS: What Really Matters - Know which metric to optimize
- What is a Good ACoS on Amazon? - Set realistic targets
Optimization Strategies:
- Amazon Match Types Guide - Targeting precision
- Negative Keywords Strategy - Cut wasted spend